概要
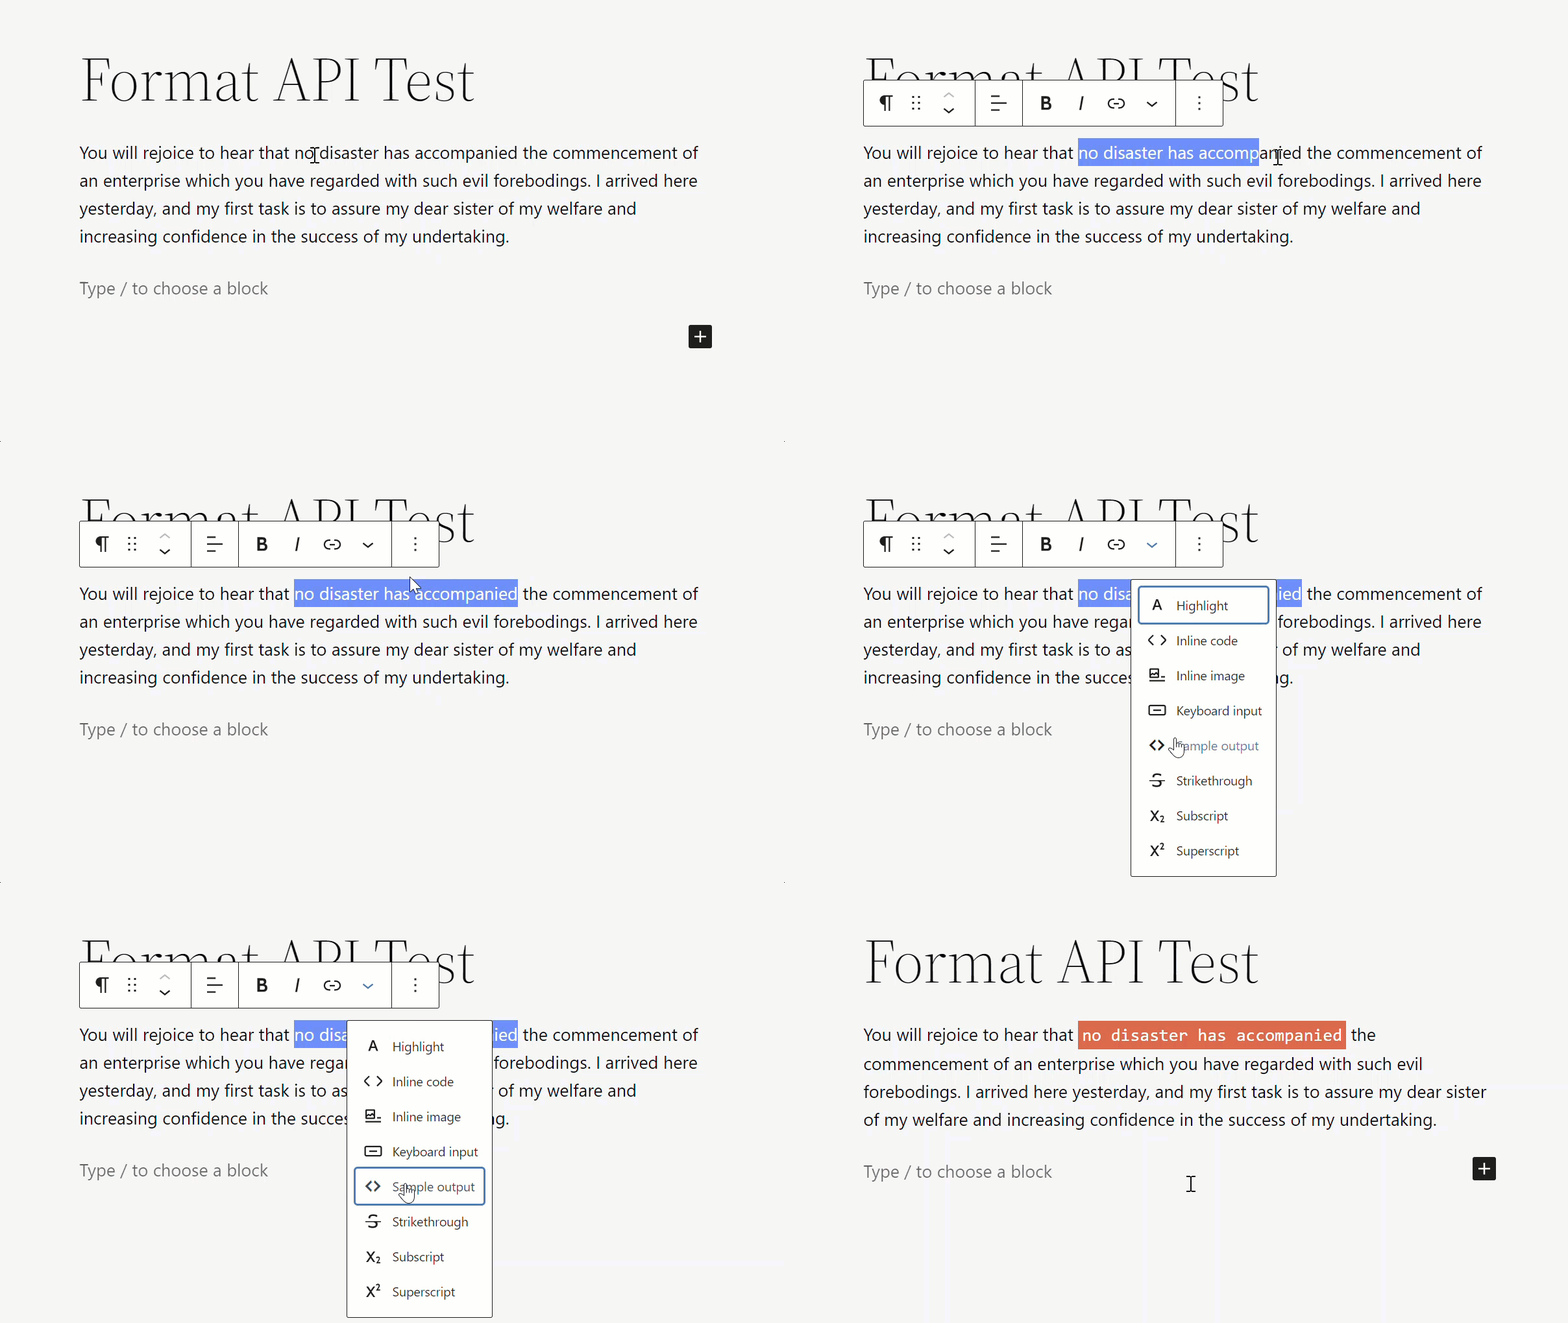
Format APIは、開発者がフォーマットツールバーにカスタムボタンを追加し、それをテキスト選択にフォーマットを適用することを可能にします。太字はフォーマットツールバーの標準ボタンの一例です。

WordPress用語では、フォーマットは、テキスト選択に特別な意味を与えるために使用されるテキストレベルの意味を持つHTMLタグです。たとえば、このチュートリアルでは、フォーマットツールバーにフックされるボタンが特定のテキスト選択を<samp> HTMLタグでラップします。
始める前に
このガイドは、すでにWordPressプラグインとそれにJavaScriptを読み込むことに慣れていることを前提としています。復習するには、プラグインハンドブックまたはJavaScriptチュートリアルを参照してください。
必要なもの:
- WordPress開発環境
- 編集の準備が整った最小限のプラグイン
- ビルドとエンキュー用のJavaScript設定
完全なformat-apiの例が利用可能で、セットアップの参考にできます。
ステップバイステップガイド
このガイドでは、src/index.jsを変更が行われるJavaScriptファイルとして参照します。各ステップの後、npm run buildを実行すると、build/index.jsが作成され、次に投稿エディタ画面に読み込まれます。
ステップ1: 新しいフォーマットを登録する
最初のステップは新しいフォーマットを登録することです。次のようにsrc/index.jsを追加します:
import { registerFormatType } from '@wordpress/rich-text';registerFormatType( 'my-custom-format/sample-output', {title: 'Sample output',tagName: 'samp',className: null,} );
利用可能なフォーマットタイプのリストはcore/rich-textストアに保持されています。ストアをクエリして、カスタムフォーマットが利用可能になっているか確認できます。
このコードをブラウザのコンソールで実行して確認してください:
wp.data.select( 'core/rich-text' ).getFormatTypes();
ステップ2: ツールバーにボタンを追加する
フォーマットが利用可能になったので、次のステップは、編集プロパティのためにコンポーネントを登録してUIにボタンを追加することです。
``````bashimport { registerFormatType } from '@wordpress/rich-text';import { RichTextToolbarButton } from '@wordpress/block-editor';const MyCustomButton = ( props ) => {return (<RichTextToolbarButtonicon="editor-code"title="Sample output"onClick={ () => {console.log( 'toggle format' );} }/>);};registerFormatType( 'my-custom-format/sample-output', {title: 'Sample output',tagName: 'samp',className: null,edit: MyCustomButton,} );`
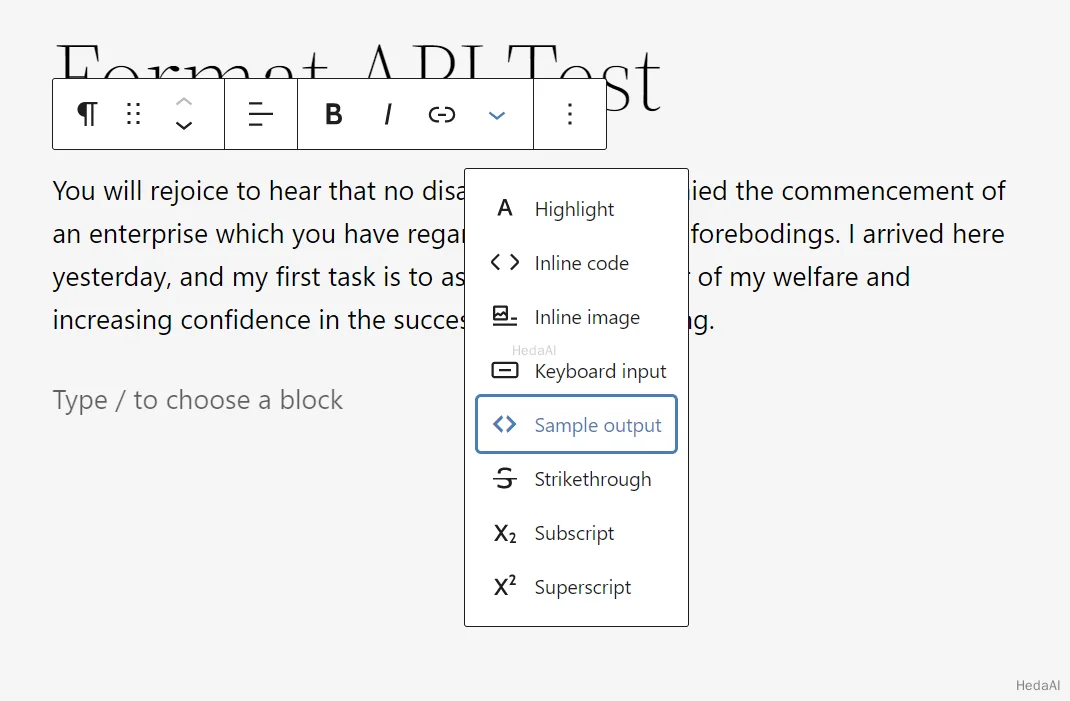
すべてが期待通りに動作しているか確認しましょう。ビルドしてリロードし、段落ブロックのようなテキストを含む任意のブロックを選択します。新しいボタンがフォーマットツールバーに追加されたことを確認してください。

ボタンをクリックし、コンソールログで「トグルフォーマット」メッセージを確認します。
ボタンやメッセージが表示されない場合は、JavaScriptが正しくビルドされ、読み込まれているか再確認し、コンソールログでエラーメッセージを確認してください。
ステップ3: クリック時にフォーマットを適用する
次は、クリック時にフォーマットを適用するようにボタンを更新します。
私たちの例では、<samp>タグフォーマットはバイナリです - テキスト選択がタグを持っているかどうかですので、RichTextパッケージのtoggleFormatメソッドを使用できます。
``````bashimport { registerFormatType, toggleFormat } from '@wordpress/rich-text';import { RichTextToolbarButton } from '@wordpress/block-editor';const MyCustomButton = ( { isActive, onChange, value } ) => {return (<RichTextToolbarButtonicon="editor-code"title="Sample output"onClick={ () => {onChange(toggleFormat( value, {type: 'my-custom-format/sample-output',} ));} }isActive={ isActive }/>);};registerFormatType( 'my-custom-format/sample-output', {title: 'Sample output',tagName: 'samp',className: null,edit: MyCustomButton,} );`
動作していることを確認します: まずビルドしてリロードし、次にテキストを選択してボタンをクリックします。ブラウザは、その選択を周囲のテキストとは異なる方法で表示する可能性があります。
HTMLビュー(コードエディタCtrl+Shift+Alt+M)に切り替えて、<samp> HTMLタグでラップされたテキスト選択を確認することもできます。
登録時にclassNameオプションを使用して、タグに独自のカスタムクラスを追加します。そのクラスとカスタムCSSを使用して、その要素をターゲットにし、スタイルを自由に設定できます。
ステップ4: 特定のブロックにのみボタンを表示する(オプション)
デフォルトでは、ボタンはすべてのリッチテキストツールバー(画像キャプション、ボタン、段落など)にレンダリングされます。特定のタイプのブロックにのみボタンをレンダリングするには、データAPIを使用します。
以下は、段落ブロックにのみボタンを表示する例です:
import { registerFormatType, toggleFormat } from '@wordpress/rich-text';import { RichTextToolbarButton } from '@wordpress/block-editor';import { useSelect } from '@wordpress/data';function ConditionalButton( { isActive, onChange, value } ) {const selectedBlock = useSelect( ( select ) => {return select( 'core/block-editor' ).getSelectedBlock();}, [] );if ( selectedBlock && selectedBlock.name !== 'core/paragraph' ) {return null;}return (<RichTextToolbarButtonicon="editor-code"title="Sample output"onClick={ () => {onChange(toggleFormat( value, {type: 'my-custom-format/sample-output',} ));} }isActive={ isActive }/>);}registerFormatType( 'my-custom-format/sample-output', {title: 'Sample output',tagName: 'samp',className: null,edit: ConditionalButton,} );
ステップ5: ドロップダウンの外にボタンを追加する(オプション)
``````bashimport { registerFormatType, toggleFormat } from '@wordpress/rich-text';import { BlockControls } from '@wordpress/block-editor';import { ToolbarGroup, ToolbarButton } from '@wordpress/components';const MyCustomButton = ( { isActive, onChange, value } ) => {return (<BlockControls><ToolbarGroup><ToolbarButtonicon="editor-code"title="Sample output"onClick={ () => {onChange(toggleFormat( value, {type: 'my-custom-format/sample-output',} ));} }isActive={ isActive }/></ToolbarGroup></BlockControls>);};registerFormatType( 'my-custom-format/sample-output', {title: 'Sample output',tagName: 'samp',className: null,edit: MyCustomButton,} );`
トラブルシューティング
エラーが発生した場合:
- まず
npm run buildを実行していることを再確認してください。 - ビルドプロセスに構文エラーや問題がないことを確認してください。
- エディタでJavaScriptが読み込まれていることを確認してください。
- コンソールエラーメッセージを確認してください。
追加リソース
このガイドで使用された参考文献:
- RichText:
registerFormatType - コンポーネント:
RichTextToolbarButton - RichText:
applyFormat - RichText:
removeFormat - RichText:
toggleFormat
結論
このガイドでは、ツールバーにボタンを追加し、それを選択したテキストにフォーマットを適用する方法を示しました。試してみて、次のプラグインで何が作れるか見てみてください。
format-apiの例をblock-development-examplesリポジトリからダウンロードしてください。
